Date: 19 Jul 2020 | Tag: stapler
In the use of a stapler, there are times when there is something called a staple jam, and sometimes, there are human errors in stapling such that we staple in the wrong place. The question then comes, how do I remove the staple without causing a damaging effect (especially) to the paper? Especially with heavy-duty staples.
This situation is when a staple remover comes into play. A staple remover plays the role of removing staples from stapled materials without compromising the integrity of the quality of the materials.
The following are the steps to take in using a staple remover:
• Release the lock on the staple remover
Depending on the model and manufacturer of your stapler remover, it likely has a lock that keeps it locked when it’s not in use. The first step in using this equipment to remove a staple is to release the lock, which then brings out its thongs for the staple removal process.
• Turn the stapled material upside down (or at least to the side of the staples that are bent)
This step of the process enables the staple remover to easily access the formed staples to allow for their easy removal.
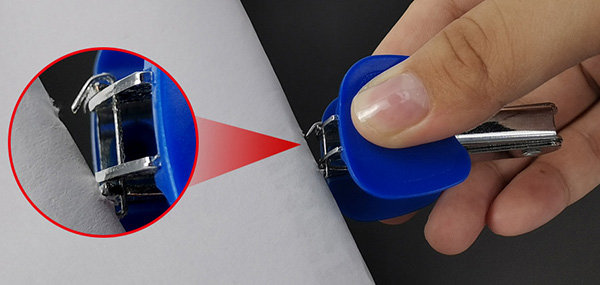
• With the four-pointed thongs of the staple remover, lift the prongs of the already formed staples
This process will straighten (to some extent) the curved edges of bent staples, allowing for the ease of the nest step.
• Turn the staple material over, and you can easily slide out the old staples.
These steps are as generic as they can be, but there may be a few variations to these steps, depending on the manufacturer of the stapler. However, these steps apply to virtually all Rayson made staple equipment.

Originally published 19 Jul 2020, updated 19 Jul 2020.