Date: 15 Jul 2020 | Tag: heavy duty stapler
It isn't just enough to have a heavy duty stapler, as it can become a very frustrating experience if a user doesn't know his/her way around the Stapler (especially when a fault looks imminent). We will be going through a set of instructions to guide the dismantling process of a heavy duty stapler. This set of guidelines apply most especially to Rayson Heavy Duty Staplers because Rayson is one of the leading stapler manufacturers of the twenty-first-century world.
The steps to take in dismantling a heavy duty stapler are as follows:
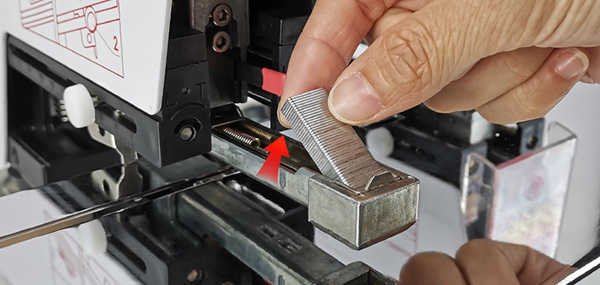
• Pull back the staple slot releaser to make free the staple slot compartment of the heavy duty Stapler.
The slot releaser is located at the topmost part of the heavy duty staple, it is spring-loaded, and you may need to apply a little push to effect this step. Once the slot releaser is released, you can then pull out the staple slot compartment easily.
• Release the stapler table clamp screw
This step may not be necessary for heavy duty staplers that have no table clamping mechanism like the Rayson SH-03. However, it is a step towards the constructive dismantling of staplers with such mechanisms like the Rayson SH-04.
The table clamp is the part of the Stapler that holds it firm on a tabletop. A screw usually fastens it. Loosening this screw will do the trick of this step.
• Adjust the Stapler's inbuilt working table using the margin adjuster.
The margin adjuster allows a heavy-duty stapler switch between flat and saddle staples. This mechanism is just above the base of the Stapler and is held by a screw bolt, which on loosening releases the compartment for adjustment.

Originally published 15 Jul 2020, updated 15 Jul 2020.